In this article, I will show you how to connect Zapier with Botbiz to send data collected via WhatsApp from Botbiz to Zapier.
You can send Botbiz‘s WhatsApp data or user input flow data to any third-party application, such as Zapier, for processing.
We can send information collected by the WhatsApp chatbot to Zapier by integrating Botbiz with Zapier.
Let’s see how you can do that.
First, you have to create a User Input Flow campaign on Botbiz.
To create a User Input Flow campaign, go to the Dashboard of Botailor. Click on the Botmanager menu (under WhatsApp Section) at the left sidebar of the dashboard.
Instantly, the WhatsApp Bot manager page will appear. Now click on the Input Flow option. Instantly, input flow settings will appear with create button.
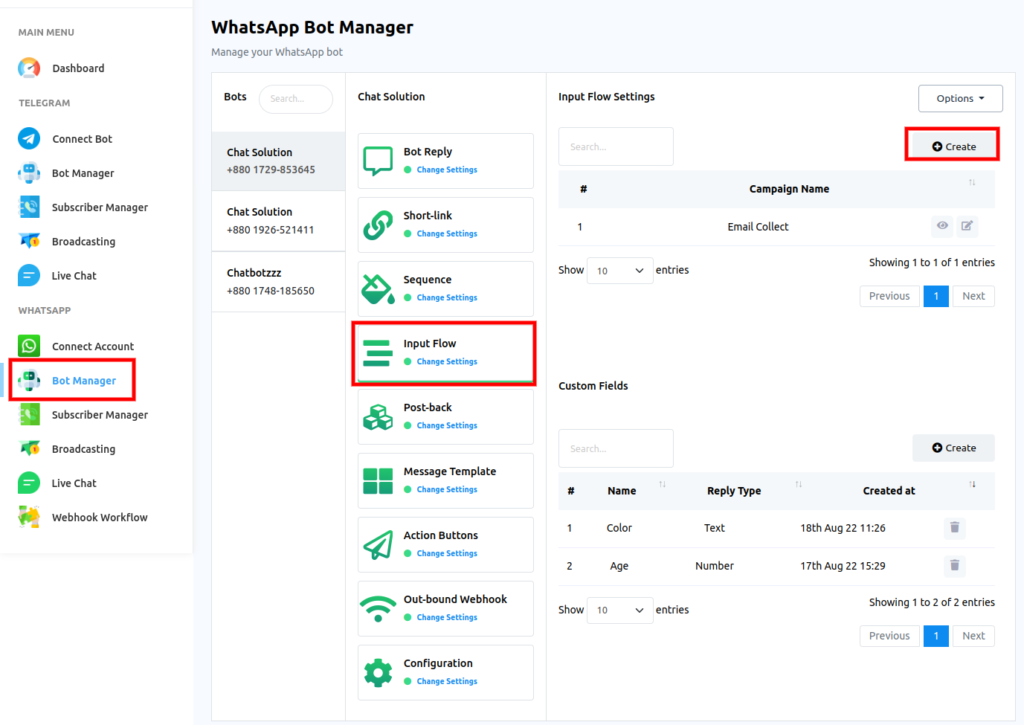
Now click on the create button. Instantly, the flow builder editor will appear with the Start bot flow and User Input Flow components connected with each other.

Double-click on the User Input Flow and instantly, a right sidebar called configure user input flow will appear with the user input flow and campaign name field.
In the user input flow field, select add new input flow option.
Provide a name in the campaign name field.

Instantly, a new question component will appear in the editor connected with the Start Flow Campaign.

Now configure the Start Bot Flow Campaign. Double-click on the Start Bot Flow campaign. Instantly, the sidebar called configure reference will appear with some fields – Titles, Choose Labels and Choose sequence.
Provide a title in the title field. Then choose a label from the drop-down list.
Also, you can choose a sequence.
Well, choosing a label and sequence is optional.

Now configure the new question component.
Double-click on the new question component. Instantly, a right sidebar called configure new question will appear.
Now select a free keyboard input.
Instantly, some fields will appear. And you have to fill out the fields.
In the question field, write a question – ask the user to provide their email address.
Then select the reply type as email.
Then click on the ok button.

You can provide a final reply. To provide a final reply, drag your cursor from the final reply socket of the new question and drop it on the editor.
Instantly, a new postback component will appear connected to the new question component.

Double-click on the new postback component. Instantly, a right sidebar called configure new postback will appear.
Provide a title in the title field. You can choose a label and a sequence. But it is optional, not required.

Now click on the ok button. And the new postback will be configured.
Now add a text component to the postback.
Drag your cursor from the next socket of the new postback and drop it on the editor. Instantly, a list of different components will appear. And from the list, select the text component. Instantly, the text component will appear.

Now configure the text component — provide a message to the text element.

Then click the ok button.
Then add the trigger component to make it a fully functional bot.

Now click on the save button to save the bot.
Let’s check the bot.
Write the keyword in WhatsApp.
Instantly, the bot will ask for the email address.
Then provide your email address.
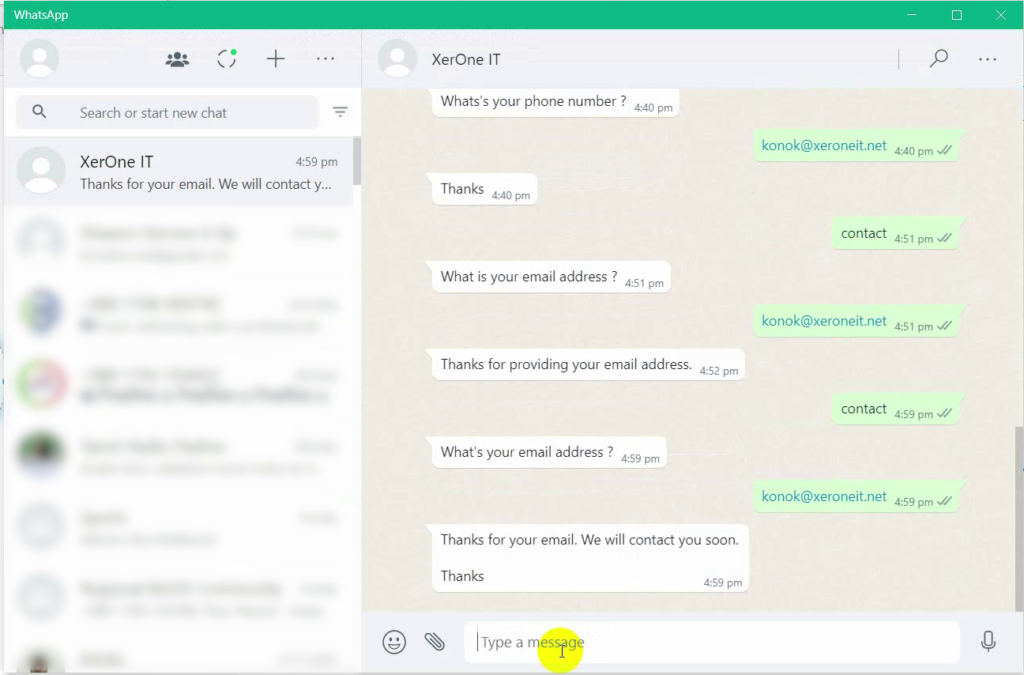
Now, if we want to send this email address or any data that we collect from the WhatsApp chatbot to Zapier or any third-party application, we need to create an outbound webhook.
Now refresh the WhatsApp bot manager page. Then click on the outbound webhook option.

Instantly, outbound webhook settings will appear with create button.
Now click on the Create button.

Instantly, a webhook outbound modal form will appear.
Provide a name in the Webhook modal name. Then you have to provide the outbound Webhook URL in the Webhook outbound URL field.

You have to get the URL from a third-party application.
Since you will connect Zapier with Botbiz, you need to get Url from Zapier.
Let’s go to Zepier. Then click on the Create Zap button.
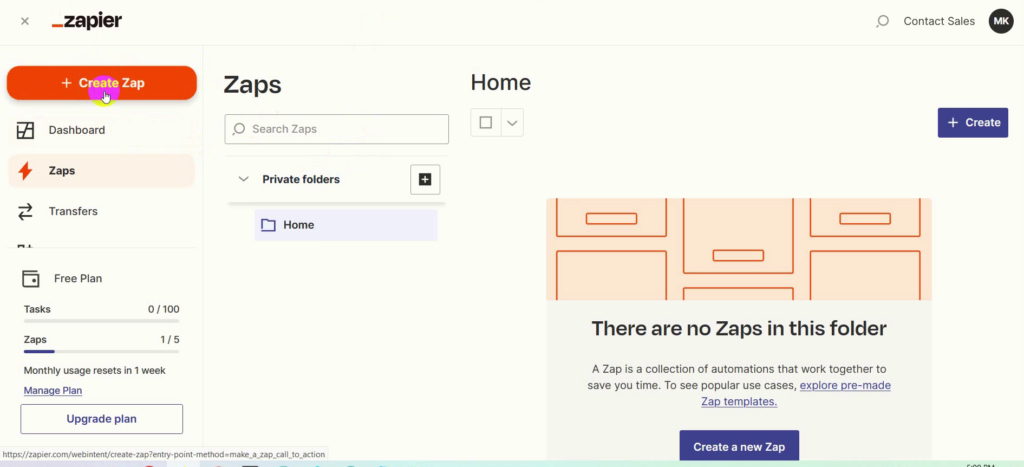
Instantly, a sandbox will appear.
In the App event field, select Webhook by Zapier.
Instantly, a modal form called Webhooks by Zapier will appear with a field called Event.
In the Event field, choose catch Catch Hook option. Then click on the Continue button.
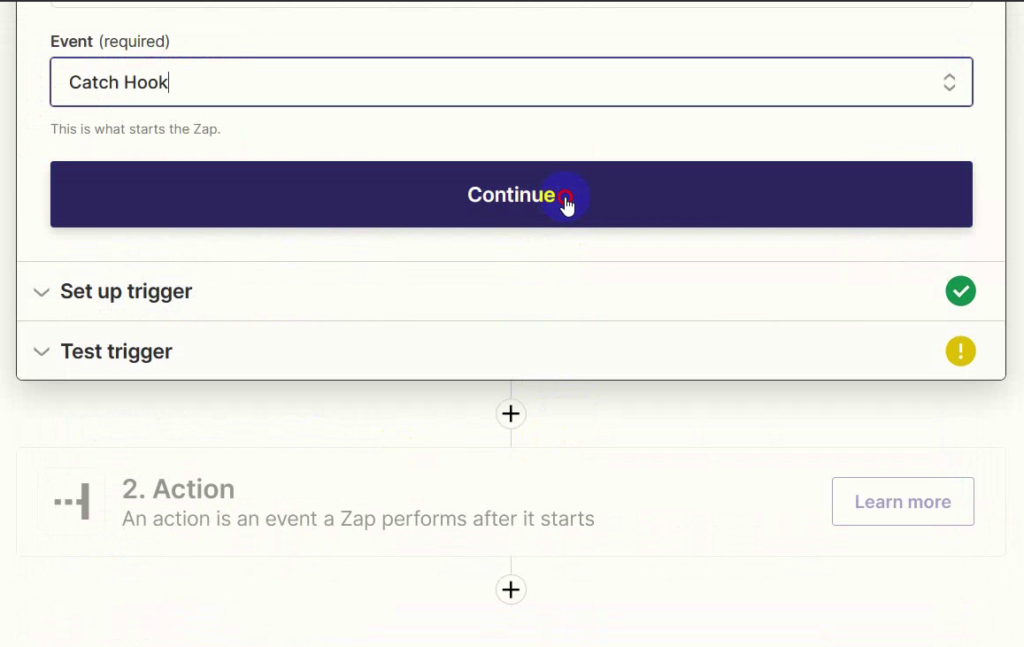
After that, click on the continue button again.
Instantly, Webhook URL will appear. And you have to copy the url.
Now go to the Botbiz. And provide the webhook URL in the out-band webhook URL field.
Here select the Subscriber name, phone number, and input flow data.
Then click on the save Webhook button.

Now, you need to send test Webhook data in Zapier.
Let’s go to the WhatsApp bot.
Let’s go to the WhatsApp bot. And write the keyword to trigger the bot with user input flow.
And the bot will ask for your email address. In response, provide your email address.
Now return to Zapier and click on the Test Trigger button.
Now you will see Zapier has collected the data.
It has collected the user’s name, chat id (which is a phone number), and user input flow data.
Now click on continue button.
Instantly, App Event selection form will appear. And select the Email by Zapier option.
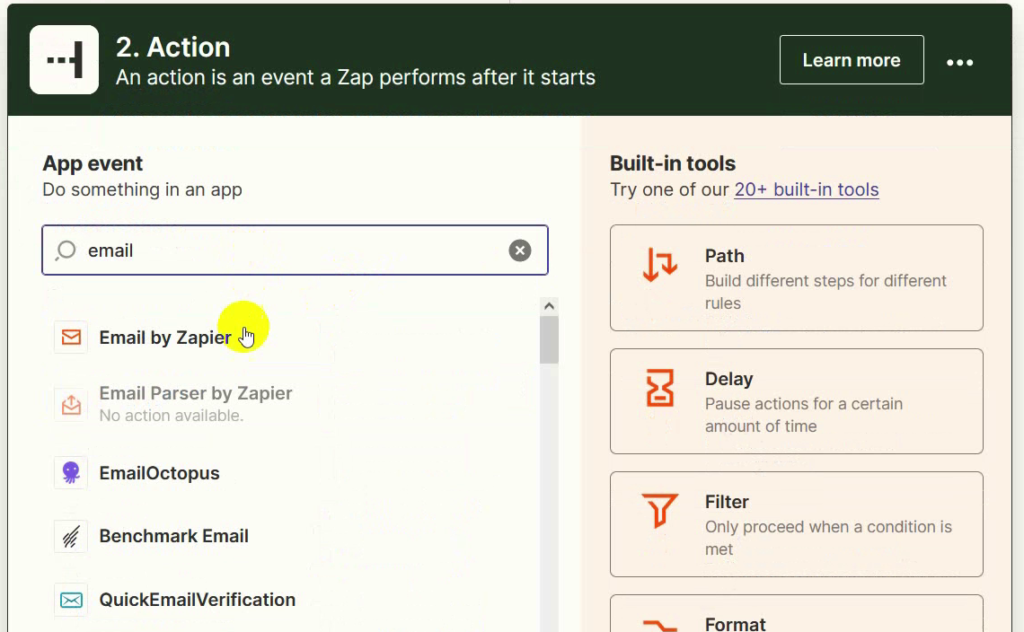
Instantly, the action email by Zapier will appear.
In the event field, you have to select Send Outbound Email option. Then click on the continue button.
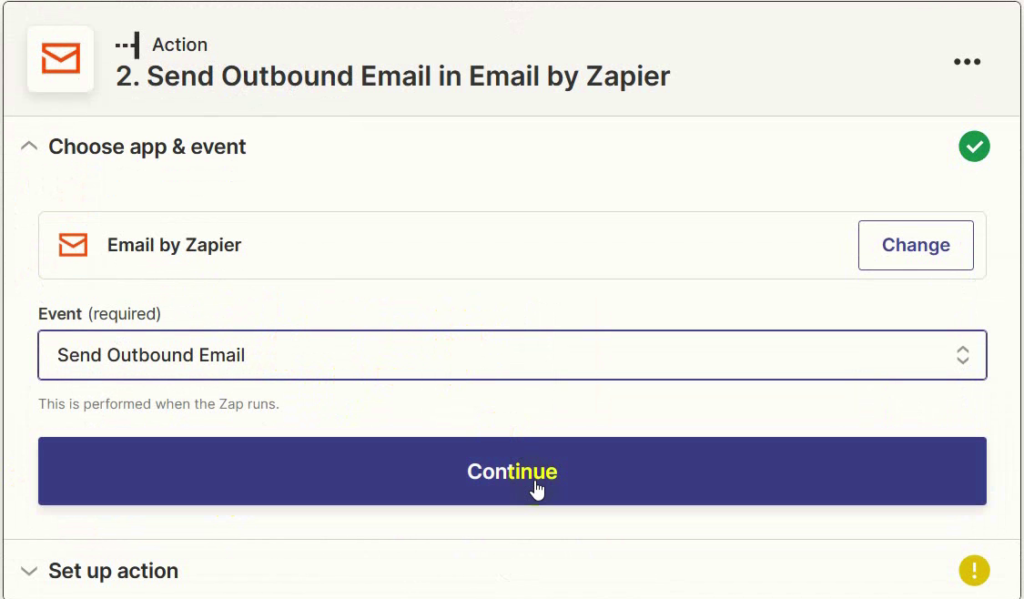
Then you have to provide information to send an email.
In the To field, select the user input data answer for the email address.
Then write a subject for the email. After that, write the body of the email. You can use the collected data in the email body. Here, I am using the name of the user.
Click on the continue button.

Then click on the test action.
Now check email to see if the email has arrived. Yes, the email has arrived.
Now, return to Zapier to publish the Zap.
Click on the publish Zap button.
Then, click on publish and turn on the button.

And your Zap will be published.

This is how you can connect Zapier with Botbiz to send data from Botbiz to Zapier.
In the same way, you can integrate Botbiz with other third party applications, like Pabbly.
Thank you for reading the article.
